
This is a small boy hooded sweater made only for the 6-12
months boy. It is the special item for the babies in the baby basket/wardrobe.
This easy hood is perfect for the babies to protect in the cold season. It’s
very thick and warm. The simple hooded sweater inspires you to crocheting for
your little ones. Some time when you finding the great and simplest pattern for
crocheting the baby items and you always find here some greatest and easy
instructions and you easy to understand it.

The pattern is so easy to crocheting, when you starting you
would come out to your finish project. I used two light colors worsted yarn for
this; both of the colors are good combination. I choose the light colors for
hood cause of this one I made for the boy. You will find here more adorable
pattern for the winter collection. All the pattern I added and share the original
design with my own written instructions if you have any problem to understanding
the pattern. I can help every time hope you like and appreciate my work.

I instruct about the pattern that it is only for the 6-12
month boy hooded sweater. It is very easy to crocheting only used a half double
crochet stitch and a single crochet stitch. The pattern is written so easy that
can very easy to understand. All the parts are making separately when completed
all the parts then join together. The front opening I added the zipper but it’s
your choice you can easy added the buttons too. After all joining the shoulder
seems then joins the hood. The hood is making very simple the picture help easy
to understand the sewing method added the simple combination of colors to
inspire you must to crochet this sweater to yours loving son or gifted to
others. It’s a great gift for the boys. So don’t waste the time and take a
crochet hook to try out this item.
Item to use:
Two color Worsted
yarn 4 ply main color white and contrast color purple (16 to 20sts= 4 inch)
Crochet hook= 3.00mm (US:
D hook-3.25mm)
Crochet needle
Scissor
Gauge: length: shoulder to bottom = 14 inch
Width:
one corner to other = 11.5 inch
Sleeve
length: shoulder to cuff = 12 inch
Size: 6-12 month
US Term
Abbreviation:
c. Crochet
St. Stitch
Sts. Stitches
Slst. Slip stitch
Hdc. Half double
crochet
Sc. Single crochet
Ch-sp. Chain space
Inc. Increasing
Ch. Chain
Rnd. Round

Pattern:
Back:
Starting with the band use a contrast color and make ch51.
Rnd1: sc in 2nd
ch, sc in each ch across, turn. (50)
Main color:
Rnd2-5: ch1, sc in
same st, sc in each st across, turn. (50)
Contrast color:
Rnd6-7: ch1, hdc in same st, hdc in each st across,
turn. (50)
Main color:
Rnd8: ch1, sc
in same st, skip next st, ch1, sc in next st, repeat (ch1, skip a st, ch1, sc
in
next st) across, turn. (50)
Rnd9: ch1, sc
in ch-sp, ch1, sc in next ch-sp, repeat (ch1, sc in ch-sp) across, sc in last
st,
turn. (50)
Contrast color:
Rnd10: ch1, hdc
in same st, 2hdc in ch-sp, 2hdc in each ch-sp across, 1hdc in last st,
turn.
(50)
Rnd11: ch1, hdc
in same st, hdc in each st across, turn. (50)
Main color:
Rnd12-23: repeat
(Rnd8, Rnd9, Rnd10, and Rnd11). (50)

Note: remember
always changing color after 2 rounds.
Main color:
Rnd24-50: ch1, hdc
in same st, hdc in each st across, turn. (50). Fasten off
Front:
Rnd1-37: follow
the same pattern of the back side.

Make neck shape:
Right front:
Main color:
Rnd38: Ch1,
hdc in same st, hdc in next 24 sts, turn. (25)
Rnd39-47: repeat (Rnd38)
Rnd48: ch1,
hdc in same st, hdc in next 14 sts, leave last 10 sts for the neck shape.
Rnd49-50: ch1, hdc
in same st, hdc in each st across, turn. (15). Fasten off
Left front:
Main color:
Rnd1: join yarn
into other side in front, ch1, hdc in same st, hdc in each st across,
turn. (25)
Rnd2-10: ch1, hdc in
same st, hdc in each st across, turn. (25)
Rnd11: slst in
10 sts, hdc in next st, hdc in each of the next 14 sts, turn. (15)
Rnd12-13: ch1, hdc in
same st, hdc in each st across, turn. (15). Fasten off

Make Sleeves:
Contrast color:
Rnd1: ch31, sc in 2nd ch, sc in each ch
across, turn. (30)
Main color:
Rnd2-5: ch1, sc in
same st, sc in each st across, turn. (30)
Contrast color:
Increasing round.
Rnd6: ch2, hdc in
same st, hdc in each st across, 2hdc in last st, turn. (32)
Rnd7: ch1, hdc in
same st, hdc in each st across, turn. (32)
Main color:
Rnd8: ch1, sc in
same st, skip next st, ch1, sc in next st, repeat (ch1, skip a st, ch1, sc in
next st) across, turn. (32)
Rnd9: ch1, sc
in ch-sp, ch1, sc in next ch-sp, repeat (ch1, sc in ch-sp) across, sc in last
st,
turn. (32)
Contrast color:
Rnd10: ch1, hdc in
same st, 2hdc in ch-sp, 2hdc in each ch-sp across, 1hdc in last st,
turn. (32)
Increasing round.
Rnd11: ch2, hdc
in same st, hdc in each st across, 2hdc in last st, turn. (34)
Main color:
Rnd12-13: repeat
(Rnd8, Rnd9). (34)
Contrast color:
Rnd14: repeat
(Rnd10). (34)
Rnd15: repeat
(Rnd11). (36)
Main color:
Rnd16-17: repeat
(Rnd8, Rnd9). (36)
Contrast color:
Rnd18: repeat
(Rnd10). (36)
Rnd19: repeat
(Rnd11). (38)
Main color:
Rnd20-21: repeat
(Rnd8, Rnd9). (38)
Contrast color:
Rnd22: repeat
(Rnd10). (38)
Rnd23: repeat
(Rnd11). (40)
Main color:
Rnd24-25: repeat
(Rnd8, Rnd9). (40)
Contrast color:
Rnd26-27: repeat
(Rnd10). (40)
Main color:
Rnd28-29: repeat
(Rnd8, Rnd9). (40)
Contrast color:
Rnd30: repeat
(Rnd10). (40)
Rnd31: repeat
(Rnd11). (42)
Main color:
Rnd32-33: repeat
(Rnd8, Rnd9). (42)
Contrast color:
Rnd34-35: repeat
(Rnd10). (42)
Main color:
Rnd36-37: repeat
(Rnd8, Rnd9). (42)
Contrast color:
Rnd38: repeat
(Rnd10). (42)
Rnd39: repeat
(Rnd11). (44)
Main color:
Rnd40-41: repeat
(Rnd8, Rnd9). (44)
Contrast color:
Rnd42-43: repeat
(Rnd10). (44)
Main color:
Rnd44-45: repeat
(Rnd8, Rnd9). (44)
Contrast color:
Rnd46: repeat
(Rnd10). (44)
Rnd47: repeat
(Rnd11). (46). Fasten off
Follow the 2nd sleeve pattern to the same.
Make hood:
Contrast color:
Rnd1: ch81, sc in
2nd ch, sc in each ch across, turn. (80)
Main color:
Rnd2-5: ch1, sc in
same st, sc in each st across, turn. (80)
Contrast color:
Rnd6-7: ch1, hdc
in same st, hdc in each st across, turn. (80)
Main color:
Rnd8-23: ch1, hdc in
same st, hdc in each st across, turn. (80)

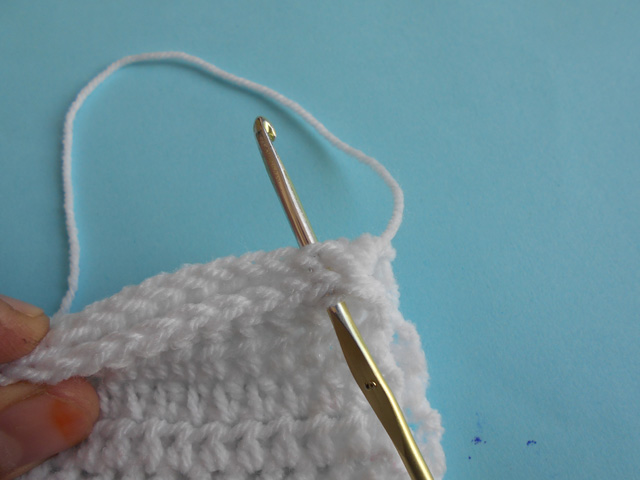
Sew the hood:
Fold in half and sew last round seems, Use the main
color and start sewing the hood into the wrong side, use a slst in each st.
(See picture)
Finishing: first sew the shoulder seem together
into the wrong side.sew a zipper into the front opening. Then attach the hood along
edge to edge of the sweater, start sewing in one corner to the other. After
finishing sew both of the sleeves and then sew the sides. Before starting pin
the sweater into the wrong side and Start sewing cuff to the end of the sides.


